Saturday, January 29, 2011

Sculpting with Gloves On and Other Adventures

I'll bet you read that title and said, "Huh???"  LOL.  Read and learn!

I got a "rush job" yesterday, a trophy job that involves me sculpting a relief of a jumper.  After I sculpt it, I'll make a mold and cast a resin of it, then finish the resin to look like bronze.  The problem is, the trophy has to be finished and in their hands by the end of March.  That isn't much time to get such work done, but fortunately for me and the customer, the big piece I'm working on requires a lot of "down time" while the clay is softening in the crock pot, so while the clay is becoming soft enough for me to use, I have time to work on other projects.

I'll back up and explain a bit here.  I'm using a crock pot as a double boiler to soften the Classic Clay Hard that I'm using on maquette for the life-size bronze I'm working on (I'll call it "Nanning," the real horse's name, to keep things simple).  It takes a while for the clay to soften even with the crock set on "high," so while it's warming, I have time to work on other things. 

I don't want to leave the crock plugged in and turned on while I'm not in the studio, so I don't turn the corck on and leave the studio while it warms the clay.  I've got the rider for "Tolt" nearly perfected and need to give that piece a couple of days of not being looked at so I can see it with fresh eyes before I do whatever touchups seem necessary.  Then I'll photograph it and send the pics to my client for approval.  I don't want to start working on the wings for the Pegasus I'm doing using "Feather" http://www.thesculptedhorse.com/feather.html as the horse's body because working on the wings takes both hands and my left shoulder is still sore and weak.  I don't have enough working room to get "Horseplay" out to work on while Tolt and Nanning are out.  With all my other current projects on "hold" for various reasons, I have time to work on this trophy relief while waiting for the clay to soften for Nanning.

My trophy customer sent me an excellent reference photo of a college-age rider jumping a nice hunter fence.  The background was very busy, with white vinyl fence behind the mostly white jump and people and a building there as well.  To  make it easier to see what I was doing, I cut the horse and fence out after printing the photo on my computer printer at the size I wanted to sculpt it.  To get it centered on the foamcore board I'm using as a working surface, I marked the outline of it on the foamcore.  This way, when I sculpt the piece, it won't be too far to one side or the other, and the mold will be much better as a result, with no possibly weak sides from being too narrow.

 Hopefully you can see the pencil outline on the foamcore above.  The cut-out reference picture that's been made the size I want it to be for the trophy is to the right.

Once I have the board marked, I start putting clay on the board to fill out the silhouette of the horse.  I will finish the horse first, then add the saddle, bridle, reins and rider (not necessarily in that order), and will build the jump and the bushes on either side of it last.

The trick to doing good reliefs is to remember that the parts closest to the viewer need to be the highest.  That seems like something that should be simple to do, but it isn't as easy to do as you might think.  Consider this horse's back legs.  The left hind leg is nearest the viewer.  That one has to be the highest.  You'd think the right leg would be the next highest thing, but this is a gelding and his sheath is showing, so the sheath has to be the second highest level and look as if it actually belongs between the back legs.  The right hind leg will be the least high.  The "least high" part still has to have a decent amount of depth top to bottom (as you look at the clay, not top to bottom of the leg) so the resin will pour well and the resulting piece won't be too thin and warp.  I have to be sure even the thinnest parts of the relief will pour well and be thick enough to be strong, but not so thick the piece loses its graceful appearance.  That's a trick in itself.

In the picture below, I've done about 45 minutes of work on the piece (with a couple of breaks to check on the clay in the crock).  You should be able to see the definition and different levels of the two back legs and the sheath.  The back legs, rump, top of the tail and the back part of the belly are all in pretty good shape now, although I need to detail the legs, of course.  I'm making this using the Classic Clay Soft I normally use.  I like it because I can push the clay around to get the various shapes needed without a lot of work, so my hands don't tire so easily.


The photo shown on the left above is the full photo.  It's about 1/3 bigger than the one I'm using for the sculpture.  You can see how the white vinyl fence behind the jump is distracting to the eye.  Having it cut out makes my job go faster - it's a nice shortcut. 

This is a *great* reference photo.  Having a straight-on, crisply focused profile shot where the camera is level with the center of the horse's body mass makes life a lot simpler for me, especially when I need to do a rush job. 

While I worked on the jumper, the clay in the crock turned to mush - I should've checked it more often.  As a result, I wound up "frosting" Nanning as if I were frosting a cake!  That was interesting!  I used a putty knife to apply the clay to bulk him up and tried to press the clay in place with my fingers.  It didn't take me long to realize I needed to get smarter about working with that hot clay.  First I took the lid off the crock so the clay would cool a bit.  That helped, but not enough.  Then I took the glass bowl the clay was in out of the crock and set it on the table beside me.  Within a few minutes, it had cooled enough to be easier to work with, but it was still hot on my hands.


Above you can see the crockpot on the left, a plastic box behind it with a red lid - that's where the sliced clay is stored - the plastic cup I used to bring more water to the crock today (there's no water in the machine shed where my studio is).  On the right of the sculpture are the tools I'm using on this one so far: the putty knife I'm using to put clay on (sometimes frosting the sculpture, LOL), a large wooden tool that I use to both press the clay tightly to the existing clay and to carve the piece a bit, and some smaller tools I haven't needed yet.  The Friesian on the bulletin board to the left in the background is not Nanning - it's just one I liked when I first started sculpting.  I never have sculpted that horse.  This is my second sculpture of Nanning (he's the horse pulling the carriage in my bronze, "Friesian Elegance" http://www.thesculptedhorse.com/Elegance.html).  The Friesian mounted on the blue Styrofoam directly behind the sculpture is Nanning 374.  In this photo, you can see the clay was laid on in rough "swooshes" - this is when the clay was too soft and I was actually "frosting" the sculpture.  It all worked out okay, don't worry!

I got the bright idea to use vinyl gloves to apply the hot clay.  The glove you can see in the pic below is a "chemical barrier glove" I use when making molds and doing other stuff with chemicals that might irritate my skin.  It's leaving interesting alligator-skin-like impressions on the clay, but that won't last.  I'll be carving this clay down with sharp tools, either heated or after having used a hair dryer on the clay to soften it (hard clay really requires a different working method than usual!) and you'll never know Nanning looked this rough or had alligator skin at any point in his construction, LOL!


As you can see in the photo above, I put a piece of clay on and smooth it out, filling in depressions and gaps with it as much as possible.  Eventually, the sculpture will be smooth and elegant and will look like the well-muscled horse it represents - it's still in the "uglies" stage for now.


This is the best way to measure with calipers - you don't put the curved tips toward each other but AWAY from each other so your eye won't be fooled by the curve in the legs of the caliper.  Here I'm measuring the length of Nanning's body.  

This reference photo isn't as easy to use as the jumper's because the horse isn't in straight profile to the camera.  His body is actually bent, so his shoulder is fairly straight to the camera, but his rump is in 3/4 view.  There are reasons for him being in this position, but the simplest explanation is that he was playing and horses do unexpected things while playing.


This is what the far side looks like when you've been adding clay from one side without turning the piece often.  The clay is still very soft, so the slabs are going on well and are smoothed out on the horse's left side, but they look pretty weird on this side, don't they?  Don't worry, I fixed it. 

Note the toothpicks sticking out of his point of shoulder and point of buttocks above.  They are there to show me how much he needs to be bulked up.  The clay should be built up until the top of those toothpicks are even with the clay.  I have a way to go, don't I?  :)


After adding more clay and blending it in, pressing it so it will be hard and strong and there won't be any "surprises" (depressions where there shouldn't be depressions) in the future, and adjusting the armature a bit (I moved his tail and two of his legs - in pressing the clay on, they got out of place a bit), this is the result.  His neck is too thick and his body not thick or long enough, but my hands and shoulders aren't as strong as they were prior to surgery, so I have to stop here for now.  Thankfully, I'm getting stronger and gaining stamina every day - it's just taking longer than I want it to! 

I'm happy with where Nanning is now.  I could see the "portriat" emerging from the beginning, but I'll bet you can start to see it now.  If you noticed the working board is up on something else, I have a 2x6 under it at the moment that has a turntable on the bottom, so it's easier for me to turn the piece to work on it.  When I get "Tolt" off my big sculpting table and no longer need to use the crock pot to soften my clay, I'll move Nanning to the sculpting table.

That's it for now!  Hope you learned something interesting from me today!


Tuesday, January 25, 2011

Finally making real progress!

And it's about time!  There was a setback when I started working and realized the armature wasn't as tight inside the plumbing T as it needed to be, so I had to remove the clay that I'd put on already and add more toothpicks until it was nice and tight.  It felt tight when I finished making it, but in moving it around some to get it mounted on the pipes, I guess some toothpicks shifted and it loosened.  There's also the fact that  my arms and hands are just not strong like they were pre-surgery, so it was as strong as I thought I could make it before.  Now it's fine.  I stripped some clay away and shoved in more toothpicks and made sure it's secure, then covered the armature with clay and added a bunch more, so now it's starting to look like something!  It still has a serious case of the uglies, but it's making big strides forward now.  I can see the horse developing and the beauty of his form in all this mess.  It WILL turn out all right, I promise!!

Some pictures to help you see what's going on:


Above is the armature I'm using - heavy wire wrapped with thinner wire running through a 1/2" plumbing T.  Yes, one set of legs is done with copper wire, the other with aluminum - I ran out of aluminum wire the right size and copper's all I had to substitute with that was the same size.


This is how the armature looked yesterday before I realized it was too loose in the plumbing T.  I had to cust off a lot of clay from the pipe area - the mid-part of the horse was totally clay-free when I got done cleaning clay off (it peels right off, being a hard clay, once you cut into it enough to give you a hand-hold.)

If you've followed my work before, you'll notice the horse is floating in mid-air rather than having the wires attached to the working surface, which is my normal way of working.  This piece is the maquette for a life-size bronze of Nanning 374, a 17 hand Friesian stallion.  There will be no bronze "grass" under the life-size to save weight and expense, so the maquette has to be made the same way.  By floating it in mid-air on a pipe with a coupling in the middle, I can take the piece off the support pipe, attach a plumbing T to the bottom of the pipe, slide a chain suspended from the ceiling through that plumbing T and hang the piece upside down so I can do the detailing on the belly and so on without having to turn myself in to a pretzel to do so.  Yay!


This is today's work after I strengthened the armature.  This is Classic Clay Hard and I normally use Classic's soft clay.  Yes, it looks exactly like the clay I normally use - it's the same brand, but two hardnesses harder (how do I say that more sensibly??  And I call myself a writer!  Argh . . .).  Classic offers two colors, this tan and a milk chocolate color.  I have trouble seeing details and defects in the dark color, so I stick with this light color.

See the red crockpot at the left?  I have a glass bowl inside the crock and water in the crock itself so the bowl acts like a double-boiler.  I put the clay my hubby sliced for me (using a blow-torch-warmed machete and a lot of upper body strength, bless him!) into the bowl (the sliced clay is in the red-topped box behind the crockpot), then set the crockpot on "high" and keep the lid on tightly.  Within a short time, the slices of clay are either nicely malleable, or so soft they're mush, depending on how thick they are!  This is the only way I can work with clay this hard since I have carpal tunnel.  Once all the clay needed is on the armature, I'll use sharp tools to carve it, and if I need it to be soft, I can aim a light at it for a little while or use a hair dryer on it for a few seconds to warm and soften the clay, or I can heat my tools, whichever seems the best at the time.

Car manufacturers use hard clay in their originals of new cars so they can carve the clay with a sharp tool and get a mirror-like finish on the clay.  That's how hard "hard" clay can be! 

I have to press it on and smooth the edges and beat it with the flat side of a big wooden tool or a wooden paddle to make sure it's applied as densely as possible.  Once I've built the clay up to approximately the size of the horse's profile, I'll start bulking out the body more until it's as big as it needs to be.  Then the fun begins - I start carving away what isn't a horse! 

More later!  As always, I welcome questions.  If you're confused or just want more information about something, please let me know.

Wednesday, January 12, 2011

Armature Angst

I had this great idea (well, I thought it was a good one anyway) to build the maquette for the life-size on an armature that wouldn't need plumbing to hold it up.  Hopefully, it might even stand on its own three feet (one foot's in the air in the pose the owner's chosen).  I built the armature out of twisted aluminum wire as I normally do, but put the wires through a galvanized connector rather than a plumbing T since I planned on this one not being mounted to a working board.  I thought the way I was making it would make it possible for me to lay it in my lap and work on the belly without any pipes in the way, so I could get the detail better.


I built the armature and shoved toothpicks in the connector (shown above) to keep the wires from wiggling, as I normally do with a plumbing T in my usual armature.  Then I wrapped it all in black duct tape, which is not something I normally do, but I thought it might be a good thing to do this time (this keeps my fingers from being poked by the toothpicks while laying on the clay).  After that, the wire was coated with Bondo so the legs wouldn't be as likely to bend as they usually are.  I started adding clay that had been warmed in a crock pot used as a double boiler (clay inside a glass bowl sitting in water in the crock).  That was all fine.  (First photo below shows the Bondo-covered armature in the seat of my chair for contrast - and yeah, those are my legs and feet at the bottom of the picture, LOL.)


After covering the armature with clay (but nowhere near as much clay as it would be when it's finished), I tried standing the horse on its feet to see how sturdy the legs were.  They weren't!  Argh.  I was hoping the Bondo would be a big help but it just didn't make them as strong as I thought it would. 

Luckily, this is a Friesian and as such, he has thicker legs than something like an Arabian or Quarter Horse, for instance.  So I built another armature with heavier wire which would be difficult to use on a horse with finer legs.  I haven't put Bondo on it yet, but now I'm thinking it just won't work the way I want it to, so I may not Bondo it at all.

Shown at right is the horse I'm sculpting and the pose he'll be in.  I printed the picture out at the size the bronze will be and arranged the wires on the picture to get the size and shape adjusted.  From there, I put a wire between the front legs and between the hind legs to spread them the width they should be, keeping the wires high enough that they stayed inside the body.  You can see those cross wires in the picture above (where the armature is covered in Bondo).


With only about 1/3 of the clay on it that it will have in total, I realized the weakness in my shoulders, arms and hands due to my shoulder surgery and long idleness while recovering is going to be a serious problem.  The piece is so big (1/6.5 life-size of a 17 hand horse) and already so heavy, working with it in my lap or on a table is just not feasible at my current strength level.  I probably wouldn't injure myself, but I'd certainly wear myself out a lot faster trying to move around a piece that heavy.  So, this armature method won't be the one I use - this time.  Perhaps in the future when I'm stronger, I'll try it again.

I've decided to try an armature method another friend told me about.  It incorporates plumbing the way I normally use it, but also has a way of unscrewing the horse from the support post, then screwing a plumbing T on the bottom so I can hang it upside down and work on the bottom side of the belly without twisting myself like a pretzel to see under the piece.  In this method, the horse is suspended in air - his feet aren't attached to the working surface the way they are in my normal armatures.  I now have all the plumbing parts I need and a chain to hang from the ceiling.  I just have to get my husband to hang the chain for me before I actually need to use it (probably next week). 

I'm not looking forward to redoing the second armature I built yesterday (the one with the heavier wire) but I think it's in my own best interests due to the atrophy of my muscles while recovering from surgery to use an armature method that's self-supporting.  I'm less likely to injure myself and more likely to be able to work longer hours if I don't have to lift that clay every time I want to move it.  My sculpture stand spins around so I can sit in my chair and turn it to get to all sides.  It's also the kind that cranks up and down rather than having to be lifted  up like my old stand, so I don't have to worry about lifting the piece until I want it to hang from that chain upside-down.  I should be able to lay it on its side to get it attached to the chain - at least until I get the detail on the horse's sides nearly finished, but by that time, the underside of the belly should be finished. 

I think this method has a lot of promise.  Keeping my fingers crossed that it works well for me!  I'll post pics of the new armature - or perhaps the piece in progress - once I get it going (Friday, most likely).

Friday, January 07, 2011

The Rest of the UPS story

Got an e from my shipper tonight.  He found out that there is no actual UPS "lost and found" site.  It's an internal setup for USP investigators only.  He still can't understand why they couldn't match the information about my claim with the piece sitting on their shelf.  Oh well.  All's well that ends well - and do get Google Alerts on your name!  It's a real help! 

Lost Bronze Found On Ebay Thanks to Google Alerts!!

Last summer, I needed to return a bronze to my foundry because the bits on the horse weren't done correctly.  I shipped it August 31. By September 1 it was lost.  It left Centerville OH and was checked into West Carrollton OH (about 10 miles away), then into Sharonville OH(about 30 miles away) and then disappeared. 

It was a  high-value package traveling via UPS.  Their practice for such packages, so I'm told, is that the manager of each stop has to walk high value packages from the truck into the building and lock it in a cage, then walk it from the cage to the next truck when it's ready to go on and tracking paperwork has to be signed each step of the way.  This type of handling should be a great safeguard, yet my bronze was lost its first day in the transit.

UPS paid the insurance to the foundry, since I was shipping on their account (because I was returning it for repair).  The foundry, at my request, cast me another piece in that edition with the money UPS gave them.  I recently got that casting - it's still in the box waiting to be mounted.

Now the story gets exciting.  Yesterday, the Google alert I have on my name (to track where I'm mentioned online - a way of tracking advertising, word of mouth, etc.) arrived in my inbox with a listing for Ebay:  "Lynda Sappington Bronze Horse & Carriage Elegance" and the edition number of the piece and the copyright year.  When I saw it, my hands literally started shaking!  The store selling it was in the Central Time Zone (I'm in the Eastern Time Zone), so calling and talking to a live person wasn't going to happen for a while, and I needed to leave for an appointment soon. 

I researched the company and found out it has an A+ Better Business Bureau rating and a 99.4% positive rating on Ebay.  Those highly positive ratings made me decide to trust that they were a legitimate business and not somebody who'd stolen my bronze to make a killing on it.  I called the company and left a message:  "This is Lynda Sappington.  You have my bronze, "Elegance," listed on Ebay.  Please stop the auction.  It was lost by UPS in shipping.  I want it back."  (Yeah, I was a bit tense when I called . . .)

I called my shipper in Centerville and told them about finding the piece on Ebay, then forwarded them the link to share with UPS.  By afternoon, I'd heard from a Centerville police officer investigating it as a theft and gotten a call from UPS as well.  And bless them, the company had stopped the auction.  By the end of the day, after a LOT of phone calls, the police were out of the picture (since it wasn't stolen) and UPS was making arrangements for it to be shipped to my foundry for repair.  I had to pay the insurance back to UPS before they would ship it to the foundry, but that was the right thing to do. 

After some investigation into how it wound up at a lost freight merchant, UPS told me there was no label on my package, so it was sent to their lost and found, which is on the Ohio/Indiana border somewhere.  They then put a listing for it online for three months.  When it wasn't claimed, they sold it to a company that buys lost freight to resell it - the company who'd listed it on Ebay.

There are several weird things about this whole situation.  I shipped it with a waybill (sp?) on it, the kind of thing that goes in one of those plastic envelopes that stick on the top of the box REALLY WELL.  So where did the label go???  They didn't say a plastic envelope was stuck to the box - they said there was no label at all.  My shippers know their business.  I've used them for probably 15 years now.  There's no way a box without a label would ever leave their shop.  Since it was marked "high value" for the insurance, my shippers think someone may have stolen it, ripped off the label, then changed their minds or something and put it back in the system.  That's the most logical explanation, anyway.  A description of the piece was sent to UPS when the insurance claim was made, yet they were apparently unaware they had that very piece in their lost and found.  Neither my shippers or I have ever heard of that lost and found website before, so we didn't know to look for it there.  We're going to find out more about that site for future reference.

Anyway - long story short - put a Google Alert on your name, your studio name and any variation of those names that might appear anywhere (on message boards, in the newspaper, in magazine ads, etc.).  Google Alerts are free - you just have to create a Gmail account to be able to get a Google Alert for as many names as you want.  Sculptors, be sure to sign your work in an obvious place in the clay, not in some obscure spot or just on a brass plate on the base.  Painters, it would probably be a good idea to make a permanent signature, not one in pencil or hidden on the back of the piece.  That may be the only identifying mark on your art if it gets lost in shipping, and it should be easy to find.

I'm so glad "Elegance" is back where it belongs (somewhere between me and the foundry at the moment, but in my control!) and appears to be undamaged.  If it's damaged, UPS and I are gonna have words . . . .  I wish that bronze could talk and tell me what happened!  At least it's not lost anymore!

Wednesday, December 29, 2010

My One-Handed Sculpting Projects

Before I knew I was going to need rotator cuff surgery in September, I agreed to be the "featured artist" in a gallery in Kettering, Ohio.  I like to do demos and meet the public, so when it was time for the show, I came up with a "one-handed sculpting" project I could do to entertain the public, keep me from going bonkers from inactivity, and make some nice Christmas presents all at the same time.

I started with 3" medallions of wood I got at Michael's. If you decide to use these, make sure they're not warped! I had to search through several packages before I found one where all the medallions were flat. These wooden medallions (my term - I don't remember what they're called on the packaging) don't have a loop at the top - they're just plain wood disks. I wanted to keep my medallions the same size and keep my Super Sculpey thin but have the actual piece thick enough to make good resin castings. The wood medallions did the trick.

I conditioned my Super Sculpey at home with my polymer clay only pasta machine (I have one for plastilene too - none for actual pasta, LOL), then took the strips of clay in a sealed plastic bag to the gallery along with my tools. I looked like Red Riding Hood with my basket over my arm with my clay, tools and reference photos, LOL!

I sat at a table in the entrance to the gallery to work. My left hand, which couldn't do any real work due to recovering from shoulder surgery, just lay on the table to hold the medallion still, while I sculpted only with my right hand. I used a cone-shaped "clay shaper" tool with a black rubber tip to do most of the work on the raised relief of the black horse. You use this tool on its side to roll the pieces of clay together and leave no "seams" between pieces - that's the best way to work polymer clays. I contoured the horse with this same technique. Using ribbon tools doesn't work as well with Super Sculpey as it does with plastilene - cutting the clay away doesn't leave as smooth a surface, so if you can roll the clay with one of these rubber-tipped tools, you'll get a much cleaner, smoother surface. 

The logo medallion (for my daughter's farm Dancing Horse Farm) was created by both adding and subtracting clay with a very narrow ribbon tool. I didn't do this original design and it is totally different from my style, so I found it more difficult to do than the black horse.

I baked the medallions (that's what you do with Sculpey products - polymer clays are baked in a kitchen oven to make them hard), then made a silicon rubber mold for both of them (one mold for two medallions). Unfortunately, it's been REALLY COLD here in Ohio, and all three of the molds I made wound up with bubbles because I couldn't get my studio above the 70 degrees required by both the mold rubber and the resin casting material. My wall heaters don't have thermostats like home furnaces do. The resin castings also had bubbles on their backs for the same reason.

I cleaned up the castings on the belt sander to remove rough edges, used small metal tools to clean up the convex bubbles on the face of the castings, washed the castings with Dawn dishwashing detergent to degrease them, then sprayed them with white acrylic paint made for plastic to be a "primer" coat (so other paints would stick well). I painted the black horse with black (Licorice) Folk Art paint and the gold on both pieces is Antique Gold Rub 'n' Buff. The Rub 'n' Buff is thick enough that the bubbles in the back of the castings aren't nearly as obvious as they were in the raw resins. I put ribbons on in the farm colors for the DHF medallion, red for the black horse medallion, and they were done!

I gave the black horse medallion (which is a portrait of Nanning 374, who I will be doing as a life-size bronze) to my client who hired me to do that job, to thank him for asking me to sculpt his horse again. I painted Nanning's name on the back of that medallion. The DHF medallions were gifts to the barn staff at Dancing Horse Farm, to thank them for taking good care of my horses while I'm recovering from this surgery and can't take care of them myself.

Anyway - I'm happy with my projects. Here they are (Nanning's is hung from a red ribbon with a bow on it in a similar style to the DHF one).


Thursday, December 09, 2010

Best-laid Plans . . .

Well, I THOUGHT "Tolt" was ready to go, but my customer wants me to work on her face a bit more.  But before I could do that, my rotator cuff tore completely off the bone - yes, it was painful!  I had surgery on September 15 and am just now beginning to be able to do a little bit of work again between naps - seriously.  My left arm won't be back to normal until maybe March, maybe later, so I'm told, but I'm also told I'm doing really well with my therapy.  I just can't type long, can't carry much in my left hand, can't do any serious work with it, can't ride on my own (although I've started back riding, taking lunge-line lessons at a walk while my daughter, who's my trainer, works on my foot and leg position to avoid stressing my shoulder, bless her.  She has a four step mounting block made to help riders get on 18 hand horses, so getting on my 15.2 guy is EASY from that block!)

Anyway - Tolt is on hold while my customer gets new pictures to me as well as a list of what she wants touched up, but I'm working on other things in the meantime.  I was the featured artist at the Town & Country Fine Art Gallery in Kettering, Ohio, for the month of November.  I did a demo there every Saturday and on "Black Friday" of what I call "one handed sculpting" - making small medallions that will be Christmas ornaments or trophy medals.  Sorry, I can't show them to you - some of them will be Christmas presents from me to certain people!  After Christmas, I'll be happy to share them and then they'll be for sale, too. 

Today I made a mold for the medallions and tomorrow I hope to start casting them in resin.  I'm excited!  Making the mold was a lot harder on my shoulder than I thought it would be, but DUH!  I can't scrape leftovers out of a pot into a storage container without hurting my shoulder.  Making a mold is very much a similar motion!  I didn't HURT myself, but I'm sore.  Luckily, resin is easier to mix and pour than mold material!

My BIG news is that I have a LIFE-SIZE COMMISSION of a Friesian stallion at play!  I'll be making the maquette (the small version, like my normal sculptures) and the foundry will have it digitally enlarged since it may be a year before I'm strong enough to do that kind of work.  They will have clay applied all over it and will get it close to what I'd sculpted, and then my customer and I will visit there (in Oregon) and he'll make sure I have the details right in the life-size (he will have already done this for the Maquette) and I'll do the finishing touches on the life-size, then the molds will be made, the piece cut up and it will be hauled to the foundry, where it will be cast.  It will take 3-4 months for me to sculpt the original, then a mold will be made on the original Maquette and a wax sent to the place where it will be enlarged.  While the enlargement is being done, the Maquette will be cast as a bronze edition, which will take 3-4 months.  The life-size will be finished 3-4 months after the Maquette is finished.  I'll post progress photos as I work on it.


Did I mention that my second novel, "Star Sons Book 2: The Gathering Alliance" is now on Amazon and other outlets?  Just do a search on my name and you'll find it.  You can also order it from your local bookstore by giving them the ISBN number.  I hope y'all will enjoy it!  It was great fun to write!

As I said, I've had shoulder surgery recently and can't sculpt normally with both hands.  Because of that, my dear non-artist hubby has volunteered to build the armature and lay on the clay for me.  I should be able to sculpt the horse one-handed for the most part once those things are done.  My customer is a kind and patient man who understands I'm recovering from serious surgery, so the timetable isn't as strict as it might be - a lot depends on how long I can work each day.  Right now, I can work a couple of hours and then I need to nap a couple of hours - seriously.  But I'm getting stronger every day!  And I'm REALLY excited at this opportunity!  I hope you'll enjoy watching this sculpture being created!

Monday, August 30, 2010

All but the Signature . . . I hope!

I think "Tolt" is nearly finished.  I just have to clean up the clay, make the pads under the horse's feet more uniform in shape and sign the title, my name and copyright along the sides of those pads.  Then I have to clean all that up too.  (Signing sculptures is a pain - nowhere near as easy to do as signing a painting!) 

I've spent literally two to three weeks pondering and picking at and trying to sculpt the rider's hands until today when I finally got everything to work the way I wanted.  It's very hard to sculpt the part of the fingers and palm that are near the horse, so I finally turned the forearms and hands out away from the horse so I could see the inside shapes better.  There are suggestions of fingernails there and even my customer's gorgeous sapphire ring is shown as a general shape on her left hand.  Her arms and hands were hard for me to do - getting the muscling and the shapes of the parts right is quite a challenge, but I think everything's good now.

I like the way the wrinkles turned out in her shirt and breeches.  I textured her clothing to make it look different from her skin when it's bronze.  I think it will be a nice look to have that slight texture on the cloth.

The clay stirrups you see on the working surface won't be the ones used.  I made Super Sculpey ones so they'll be sturdier to ship (Super Sculpey is a polymer clay you can bake in the oven so it's hard, unlike plastilene which is always soft.)  The stirrups, stirrup leathers and reins will all be hand-made at the foundry for each piece, although they MAY be able to cast the stirrups.  I'm not sure if they're thick enough to cast well unless they use jewelry-type casting (centrifugal casting). 

Without further ado, here are the pictures!

The shape behind the hoof is supposed to be a splash of dirt.  I may change it a bit before declaring a victory on this piece.
When I saw this pic, I realized I need to add a browband.  I'll do that tomorrow.

  I'll be glad to get this one finished!  I've been working on it a long time, but I'm happy with how it's turned out.

Tuesday, July 27, 2010

Beginning of the end - I hope!

I'm getting close to finishing this piece, HUZZAH!  I just need to add a bridle on the horse and do the wrists and hands of the rider, thicken the tail a bit and make the rider's eyes match better - they're a tiny bit off.  Then I have to sign it and I'm finished!!
The horse's tail is nice and thick-looking from the back, but from the side, it isn't quite bushy enough.  Like most Icelandics, this mare has a really thick mane and tail.  I think the mane looks pretty good, but the tail needs to be thicker and needs more movement as seen from each side.  I'll work on that today.

The "splash" you see behind that right hind foot is necessary for support and strength for the piece.  In real life, that foot would be flying through the air like both left feet, but the horse needs more than one point of contact with the base in order to be strong enough to stand without bending the supporting leg.  The "splash" of dirt may be modified a bit, I don't know yet.  It's easy to sculpt them in relief, but doing them 3-D, it's a lot harder to get the look I want.

The stirrups are on the working surface (the board) in front of the piece in the photo above.  They won't be attached until the piece is in bronze because they are too delicate to cast properly.  They will be hand made for each sculpture, just as the bit rings, stirrup leathers and reins will be.  I think I'm going to remake the stirrups out of Super Sculpey so they'll ship more safely.

See how nice and thick her tail looks from behind?  I need to get that feeling from each side too.  Her ears barely show from all the flying forelock in real life.  I'm still trying to decide if I want to put more forelock on her to hide more of her ears or not.  What do you think?  I'm open to suggestions!

The rider's neck looks a bit rough because I haven't cleaned this sculpture up with chemicals yet.  When I finish, I'll use a small filbert paint brush and some orange cleaning liquid straight from the bottle (I'll squirt it into a small bowl I can dip the brush in) and paint the whole thing with the cleaning liquid.  That chemical will melt the surface of the clay just a tiny bit, smoothing out some places and getting rid of the crumbs as well.  I may still need to do some clean-up with tools after I use the chemical, but the chemical will show me where I need to do that.

She looks like my customer, which pleases me a lot since I haven't done a sculpture of someone with an open smile before.  Every picture I have of her, she's got a happy smile on her face, so that's what I used.

I have stirrup leathers on the inside of the rider's legs, cut off at the point where they would not be against hte leg in real life as they stretch to support the stirrups.  The foundry will add flattened copper wire the width of the leathers I've started when they put the stirrups on.

If you have questions or comments, feel free to write me!  Thanks for your interest.

Tuesday, July 06, 2010

Ahhh, that's better . . . "Tolt" and "Star Sons 2" news!!

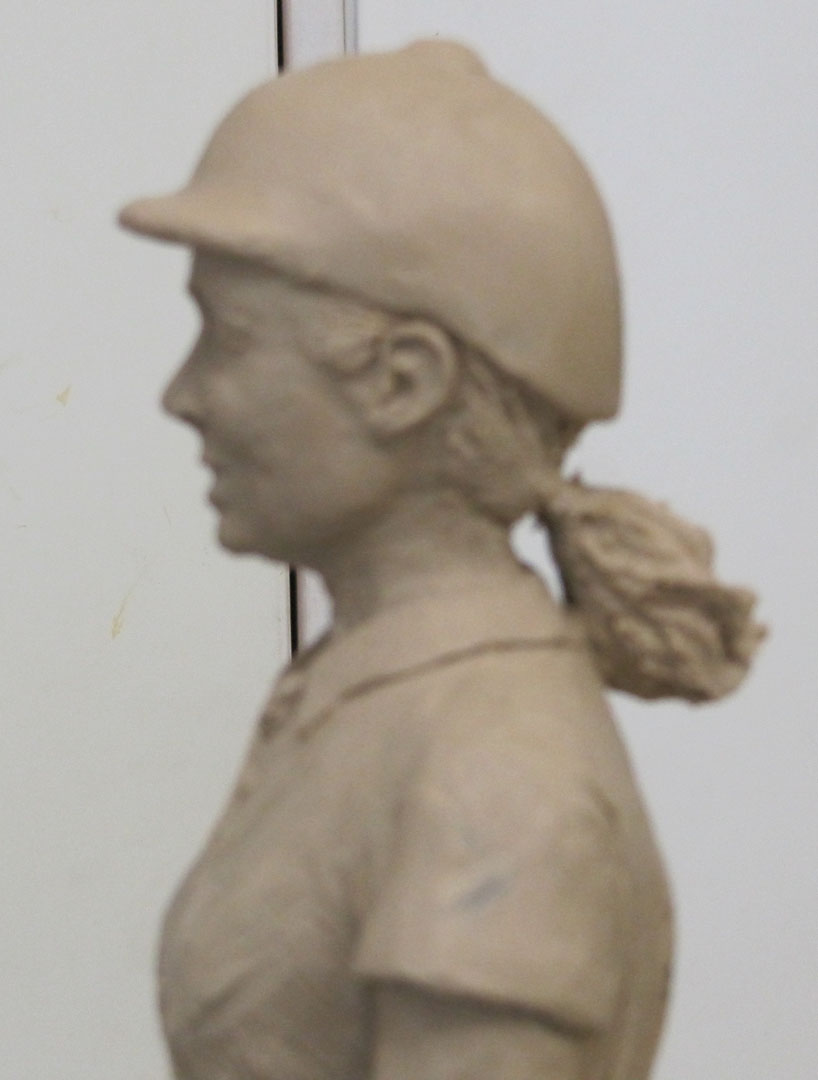
I finally saw what was bothering me about the rider's face.  I knew something was a bit off, but I couldn't quite figure out how to fix it.  Then I saw it.  The eyes were set too high (by about 1/16th of an inch), and the place where the nose dips in toward the eyes was set in the wrong place (by an even smaller margin).  So today I put dabs of clay in the places where the eyes were, smoothed that out and started over - not my favorite thing to do, especially on something as delicate and difficult to create as the eyes on this rider.  But I did it, and revised the shape of her cheekbones somewhat, her temples and browbone, the nose, and even brought the brim of the helmet lower and trimmed some off the top of the helmet.  I like it a lot better now.  I think I need to broaden the lower cheeks and jaw just a tiny bit on each side, and then it just might look like my customer!  YAY!  Here are some pictures to show what I accomplished today.

I know her helmet still needs straps, but I'm not going to add them until I'm satisfied with her face.

As you may be able to see from the pictures above, and will certainly see in the picture below, I also started working on the mane, getting the masses of the flying mane and forelock somewhat defined on one side, as well as filling in holes and undercuts so it will cast well.

I think this will be a beautiful piece!  I'm excited to see it coming together so well!

In other news, I've finished the revisions on my second "Star Sons" novel (titled "The Gathering Alliance") and am printing it out right now for a final read-through to make sure I haven't missed anything in proofreading.  The cover art is finished and there are only a few details to complete before it will be ready for publication.  HUZZAH!!!  I'll post ordering info here and on Facebook and my Yahoo groups when it's ready to go.  It will be available from me as well as from Amazon.com, BN.com and various other outlets. You will also be able to order it in your local bookstore with its ISBN number.  I'm excited to have this finished!  YAAAY!!

Monday, July 05, 2010

Evolution of a Face

As I posted on my fan page on Facebook, I had to cut the face off of my rider and redo it.  I thought you might enjoy seeing how a face evolves - at least, the way I do it.

My rider started out with just a piece of clay shaped vaguely like a head, with eyes, nose and mouth just roughed in to give me a place to start.  I left her like that while I worked on her body and clothes, the horse and saddle.  Now I'm back to working on the rider's face.

The face I first put on any figurative sculpture will look odd because I make the bone structure very prominent, particularly the cheekbones.  It's also my habit to start with more clay than I need and carve down to where the portrait is.  Above you can see I've started refining the features on the left side of the rider's face.

Here you can see the roughed in features and the basic shape of the head from the side.  It isn't too big yet, but it's heading that way.

At this point (a week later than the previous pics), I've added and subtracted and pushed and pulled the clay trying to get the features placed where I want them.  Some of it's coming together, but the cheekbones are, as usual for me early in a figurative piece, too prominent and too high.  As you can see, the head is now too big, although I haven't enlarged the helmet enough yet for it to look like a real helmet fitted properly to her head.  It's mostly a brim on the skull I'd made before at this point.  The nose is too long too.  This is a petite lady with nice cheekbones, but hers aren't this extreme.  This is just the way I do it as I try to find my way to the portrait. 


This is a couple of days later, more refined and looking more human, but the head is still too big.  I just  haven't noticed it's too big because I'm focusing on it too much.  The lumpy clay in front of the rider is the beginning of the flying mane on the horse.

Side view from the same day.  I like the ear but it's a little big for her.  I'm not happy with her nose, it just isn't right yet.  The head is still too big, and this is the day I realized that fact.  To say I was unhappy is a bit of an understatement.  *sigh*

After I realized the head was too big, I spent some of that time away from it trying to figure out what to do about it.  I finally realized I was going to have to cut off the entire face.   Argh.

Yes, it WAS painful to cut off her face!  And then I had to cut off both sides of her head (two nice ears!  WAAH!) and trim the back of it too!  But it certainly improved the piece.  After several hours of work, I was pretty well pleased with how she looks.  I used minerettes (tiny tools - see picture below) and a small, firm cone-shaped rubber clay shaper to do most of the work.  The tools near the top of the picture (below) are normal-sized tools.  There's a pop can to the left of the minerettes to give you an idea of their size.  The metal one has a squared off loop at one end and a pear-shaped loop at the other.  The two wooden ones are about half-again the thickness of round toothpicks.  The top wooden one has a curved blade shape carved in each end.  One of them has gotten rough from use (plastilene can grind down even metal tools over time).  The bottom tool has wire tips that end in flattened spoon shapes.  The wire isn't much bigger than straight pin wire.  I got these in Loveland, Colorado - I haven't seen them in catalogs, but if you search for them, you might find them.  I don't often need them, but sometimes they are exactly the right thing to use.


And so I made a new face on my rider.  Here's where she is today:


She still needs some work, but she looks a lot more like my customer now!  You may notice she has an open-mouthed smile now.  In every photo I have of my customer, she has an open-lipped smile which is very pretty but darned hard to sculpt.  I tried giving her a closed-mouth smile so it would sculpt more easily but gave up on it.  The horse is flying and she should look like she's having fun, so an open smile it is!

I don't have the right lighting in the studio to show the detail of her eyes, but they look better than they do in these photos.  I'm going to re-measure to make sure I have them at the right height.  From the side they look fine but from the front, they look too high-set.  Argh . . .

The mare has ears, a forelock and complete mane now, and I've started detailing it.  That's a lot more fun than fighting with tiny details in the face, but boy, fighting with those details is worth it.

Hope you've enjoyed watching "the evolution of a face"!  I'll post new pics as she continues to evolve.

Wednesday, June 09, 2010

Boots, breeches and stirrups

Today I made stirrups for my rider.  That's a lot  harder than you'd think.  It took me a while to find the right size wire to be the top of the stirrup (to look the right size while covered with clay) and to make the tread of the stirrup strong and straight.  I used scraps from the perforated aluminum sheet I'm using as the armature for Feather's wings to make the tread strong and straight and aluminum armature wire for the top.  The bottom loop where the stirrup leather goes through was added by just putting a roll of clay there and carving it down.  You may be able to see that on the pic of the rider with the stirrup in place.

That pic is a bit crooked, sorry.  The leather goes up inside the rider's leg and is adhered to her leg and the horse, in the appropriate places.  I'll cut the stirrup off the piece just above where the leather goes through the stirrup when I get ready to send it to the foundry.  It would just drop off if the piece was dropped or shaken as it will be in shipping.  They can weld it in place in bronze.

The boots and breeches are done, and I think you can see the bottom of her shirt.  She was wearing a blouse that wasn't tucked in, and for now, I'm sculpting what she was wearing.  I'm going to send her pics soon so she can decide if she wants her shirt tucked in, sleeves on the shirt (her shirt was sleeveless), etc.

This shot's a bit closer, but also crooked - hard to get great shots with a phone.  I'll straighten these pics and re-upload them when I have more time.  I'm kinda rushing to get this online right now. 

BTW, this hind foot will soon be cut free of the wire holding it to the ground.  This foot in reality wouldn't have any dirt splashing up to support it, so I have to make it free.  I talked to my foundry about it to make sure having only two legs on one side would be strong enough to support a piece this big without it bending.  Bronze is soft, after all - it's mostly made out of copper.  Anyway, they said it should be fine, and they'll put bronze rods inside the legs touching the ground to strengthen them if they think that support will be needed.

When I cut this foot free, I will cut the wire up inside the hoof (thus ruining that nice hoof, so I'll have to sculpt it again) and then I'll put a wall, sole and frog in the bottom of the foot.

This is how the whole piece looks right now.  I haven't done any work above the waist - it's all just "placeholders" for now, measured pretty well, but not sculpted anywhere near what those parts will be like when it's finished.  I need to raise the shoulders a bit - they're too low.

Anyway, that's progress to date!  Comments and questions are welcome.

Thursday, June 03, 2010

Progress!

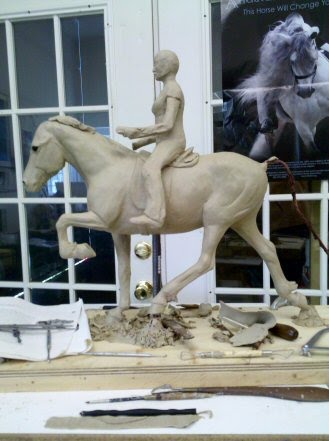
It finally looks like I'm getting somewhere on this piece!  A lot of the previous work has been painstaking and tedious, trying to get the horse built properly, making sure there are no dips or bumps where there shouldn't be, and making the horse a functional being with all the joints in the proper places, etc.  Now I've added a saddle and the rider.  The rider will be removed for shipping - she's only attached by a couple of wires sticking out below her seat bones into the horse.  She'll be welded or soldered in place by the foundry when this piece is cast in bronze.

The saddle is supposed to be an Icelandic saddle.  In addition to looking at the photos I took of my client's two saddles, I researched them online and found quite a wide variation in how they look.  I'm going with the English show saddle look rather than the quilted seat I found on several Icelandic saddles simply because it's less distracting visually to have a smooth seat rather than a quilted one.  I will probably cut the flaps a little shorter - they look too long in comparison with the rider's leg.

I've had to redo the cantle of the saddle about five times now, trying to get it placed right and to make it fit the horse and rider both as well as possible.  I think I'm about there with the cantle.  Now I'm working on the length of the rider's legs and the shape of her boots.  I realized I had cut the wire too short on one leg and had to add some wire to have a good support for her foot.  That's why I'm posting these pics today, to show you how I did that repair.

I've cut off the clay at the bottom of her leg, exposing the wire.  I then attached a lighter wire, wrapping it securely around the existing wire of the leg, using pliers to help me get it as tight as possible.  After wrapping it several times around the larger wire to make it as secure as possible, I started twisting the wire to both strengthen the wire and to give the clay something to bite into so it won't slide around.  (Aluminum wire is slippery to clay if it isn't either twisted itself or isn't wrapped around another wire.)  I doubled the twisted wire (shown above) back on itself and twisted it some more to make it stronger (not shown), then added clay over that to make the new foot.

Here's a closeup of the wire before I folded it back on itself and twisted it again.

Here's the other side of the piece.  This leg is actually a bit too short too, but there's plenty of wire there.  I'll pull the clay off the foot, straighten the wire for a short distance to lengthen the leg, then bend the end up to support the foot and add clay to make the boot again.

I'm having to fight my dressage training in positioning the rider.  She doesn't ride dressage nor do other Icelandic riders (with a few exceptions I know of), so putting her in a dressage position would be wrong.  I haven't had this much trouble positioning a rider in a long time - I guess that shows my dressage training is becoming ingrained!  But I need to be careful about that with my art.  Not all riders ride dressage.

That gorgeous picture behind the sculpture is the International Andalusian & Luisitano Horse Association (IALHA) poster from a couple of years ago featuring the gorgeous stallion, Santiago.  His mane really does reach down past his knees and he seems to have a lovely disposition.  I was fortunate enough to see him at the Midwest Fiesta in 2008 and was given one of these posters then (I had my art booth there marketing my art while I was working on the original of "Feather," which is an Andy stallion now available in bronze).  I had no idea at the time that within a few months of that show, I'd have my very own half-Andalusian (El Paso Aricos, my dressage horse).  Surprise surprise!
This is a picture of my handsome Ricos with my daughter, trainer Jennifer Truett of Dancing Horse Farm, Lebanon OH (www.dhf-oh.com) riding him.  Since I mentioned him in reference to that IALHA poster, I thought I'd include his picture here.  I like this picture so much, I use it as my desktop.

Back to the sculpture:  Don't worry about the rider's face - right now her facial features are more "markers" than anything else.  She doesn't look like herself at all yet!  Her face is even a bit mashed because I grabbed her head and changed the angle of her neck and head from the side (they were too far back).  Her arms and hands haven't been worked on at all yet.  I'll get to them, don't worry!

A lot of sculpting (the way I do it, anyway!) seems to be "take two steps forward, three steps back" at times.  As I work around the piece, I may find that something that looked and measured right before is now too long or too short in relation to some other part and the reference material.  Just  by bending one leg of the rider down so it laid properly along the horse's side changed the way it looked lengthwise, so I had to make some adjustments.  That kind of thing happens frequently.  Just one of the many challenges of 3-D work!

The little lump of clay on the horse's neck is a sign of my eagerness to get to the mane and tail.  They're some of the last things I do on a sculpture, but they're also FUN so I'm eager to get to them.  But it's too soon, so I was just messing around and left it there.

I'm pleased with the progress so far.  Yay!

Saturday, May 22, 2010

Details, details, details . . .

Now I'm at the point of building the saddle on the horse and making sure it fits the rider.  The rider is nowhere near perfect yet, but she's about as thick as she's going to be front to back (this is a petite middle-aged rider).  I  may need to adjust the length of her legs once I get back to work on her, but for now, I'm just getting the saddle assembled and placed where it should be.  I know I need to get her body more proportionate and to get her sitting on her seat bones.  I'll get there eventually.

At first, I had the saddle a bit long for this rider - If you look carefully, you should be able to see I've just cut the clay at the back of the cantle so it fits the rider better.  I've just turned a bit of clay over to fill in some of the seat behind her, actually, and then put a cut behind the cantle as a marker for when I get back to work on it.

You can also see I've put feathers on three of the legs now, and those legs have also developed muscles, bones and tendons.  I've put a bit of clay on the neck as well, starting to plan out the movement of the mane.  The strips of clay ahead of where the saddle's knee rolls should be in the picture below are just extra pieces I haven't trimmed off yet.  I've only developed the saddle on the left side and a bit on top.  The right side will be done tomorrow.


Here are some detail shots of the horse and rider. 

Don't worry, her ankles and feet will be straight with no wire sticking out of them when I get finished.  For now, this is very much a work in progress.  The knee rolls are just being developed and will be shaped better before I declare a victory over them.

I'm pretty pleased with how it's coming along.  Hope you enjoy seeing its progress!